Expert Guide to a Perfectly Burned Wooden Wick Candle
There’s something magical about the gentle crackle of a wooden wick candle. It’s like having a mini fireplace right in your living room, but with a little extra care needed to keep the magic alive. Let’s dive into the world of wooden wick candles and make sure every light is as enchanting as the first.
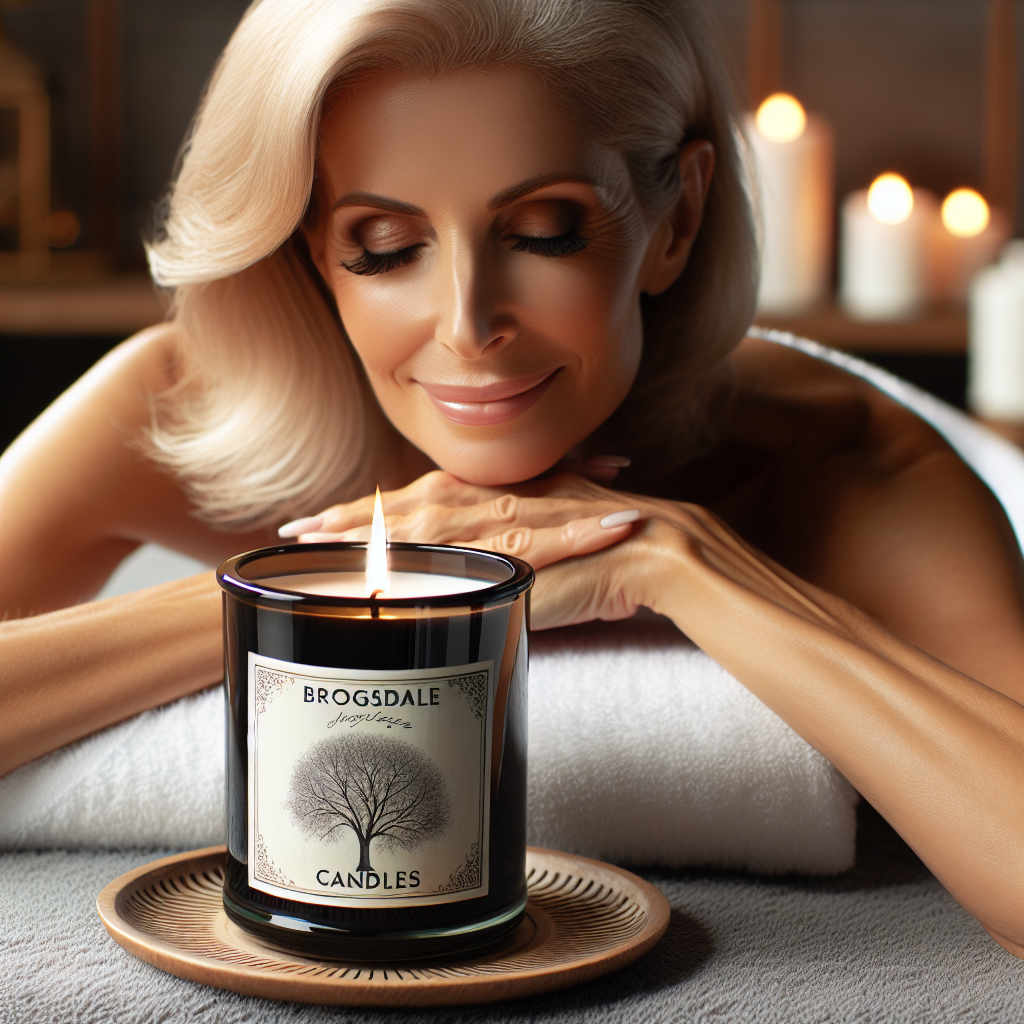
Before we get into the nitty-gritty, remember that Brogsdale Candles guarantees that their wooden wick will light and stay lit every time, or you get your money back. Now, that’s a promise that sparks confidence! Check out their selection at http://brogsdalecandles.com/.
Key Takeaways
- Trim your wick to 1/8 inch before the first burn to ensure a clean light.
- Light your candle by tilting it, ensuring the flame spreads evenly across the wick.
- Let the wax pool reach the edges of the container on the first burn to prevent tunneling.
- Keep the wax pool clear of debris for a clean burn.
- Trim the wick before each burn to maintain a steady flame and extend your candle’s life.
Crucial Initial Steps for Wooden Wick Candle Care
First impressions matter, and that’s true for your wooden wick candle too. Before you even think about striking a match, give your candle wick a little trim. You want about 1/8 inch of wick peeking above the wax. This small step is a big deal—it prevents the dreaded ‘mushrooming’ effect and keeps your flame dancing just right.
Now, it’s time to light up. But hold on, not so fast! Tilt your candle slightly, and light the wick from one side to the other. This way, the flame catches evenly and sets the stage for a uniform melt pool. Trust me, your candle will thank you for this warm and even start.
Let’s talk about the melt pool. For an even burn, you’ll want to let the wax melt across the entire surface of the candle. This could take a few hours, so be patient. It’s worth it to prevent tunneling, where the middle melts down, leaving hard wax on the sides. Not only does it look funky, but it also shortens your candle’s lifespan.
Strategic Wick Trimming Techniques
After the initial burn, keep an eye on your wick. If it’s getting a bit too flamboyant (we’re talking over an inch high), it’s time for a trim. A wick that’s too long can create smoke and soot, and no one wants that. Gently pinch off the burnt bits or use a wick trimmer for a precise cut. Aim to keep it at that sweet spot of 1/8 inch.
Remember, a well-trimmed wick is a happy wick. It’s not just about size; it’s about shape too. A jagged or uneven wick can lead to an unpredictable flame, so keep it clean and straight. And always trim when the wax is cool to avoid any hot wax mishaps.
Here’s a pro tip: after trimming, gently brush off any debris from the wick and the wax. This little bit of housekeeping ensures your next burn is as beautiful as the first, with a clear melt pool and a steady flame.
First Burn Success: The Foundation of Even Burning
The first burn is a big moment. It sets the stage for every burn to come. So, let’s make it count. After trimming the wick, light your candle, and let it burn until the wax pool reaches the edges. This might take a while, but it’s the secret to an even burn down the line.
While you’re waiting, enjoy the ambiance. The soft crackle of the wood, the warm glow of the flame—it’s a sensory experience that’s as relaxing as it is beautiful. Just make sure to keep an eye on the clock, as you don’t want to go past the four-hour mark. A little discipline now means a lot of cozy evenings ahead.
Once the wax pool has reached the edges, it’s time to blow out the flame. Let the candle cool completely before you even think about relighting it. This pause allows the wax to set evenly, which is essential for the longevity of your candle.
Trimming the Wick: The Ideal Length
Let’s get specific about wick length. The perfect length for your wooden wick is 1/8 inch—no more, no less. Why so precise? Well, a shorter wick might drown in the wax, while a longer one can turn your cozy corner into a smokehouse. So, grab those trimmers and keep it just right.
And here’s a little secret: trimming your wick isn’t just about length. It’s about creating a smooth surface for the flame to catch. Avoid using scissors that can crush the wood. Instead, opt for a dedicated wick trimmer, or simply pinch the cool wick with your fingers. A clean cut means a clean burn.
- Trim to 1/8 inch before each burn.
- Use a wick trimmer for a precise cut.
- Avoid scissors to prevent wick damage.
- Trim when the wax is cool for safety and precision.
- Keep the wick’s surface smooth for an even flame.
Proper Lighting Methods for Wood Wicks
Now, let’s talk about lighting your candle the right way. Tilt the candle, and use a long lighter to evenly ignite the wick from one end to the other. This ensures the entire width of the wick catches, setting you up for an even melt pool. No shortcuts here; take your time and watch the flame spread.
And remember, patience is key. Hold the flame to the wick a bit longer than you would with a cotton wick. Wood is a bit more stubborn, but with a gentle and steady hand, you’ll have a beautiful, crackling flame in no time.
Maximizing the Initial Melt Pool
The initial melt pool is like the foundation of a house—it needs to be solid. So, on that first burn, let the wax melt all the way to the edges of the container. This could take a few hours, but it’s crucial for preventing tunneling and ensuring an even burn every time you light it.
Once you’ve got a full melt pool, it’s time to blow out the candle and let it cool. This initial effort pays off big time, as it sets the memory of the wax, ensuring even burns in the future. And remember, a full melt pool means more fragrance, and who doesn’t want that?
Maintenance for Optimal Burn Quality
Maintenance is the key to candle longevity. Just like you wouldn’t drive a car without regular oil changes, you shouldn’t burn a candle without proper upkeep. This means trimming the wick, keeping the wax clean, and knowing when to call it a night.
Routine Wick Care During Burns
Each time you light your candle, check the wick. If it’s looking a bit wild, give it a trim. And after extinguishing the flame, let the candle cool before you trim. This routine care keeps your flame under control and your candle burning bright and beautiful.
Don’t forget to remove any charred bits of wick from the wax pool. These little floaters can lead to a less than perfect burn, and we’re all about perfection here. A clean wick and a clean pool mean a clean burn, every single time.
Ensuring Wax Pool Clarity and Cleanliness
A clear wax pool isn’t just aesthetically pleasing; it’s a sign of a well-maintained candle. Keep an eye out for any debris that might have fallen into the wax. A quick clean-up ensures nothing gets in the way of your candle’s performance.
And here’s a tip: if you see soot building up on the edges of your candle jar, give it a wipe with a damp cloth after the wax has cooled. Keeping the jar clean not only looks better, but it also reflects the light from the flame, enhancing the glow in your room.
Remember, a little effort goes a long way. With these tips, your wooden wick candles will burn evenly, smell fantastic, and last longer, making every evening a little cozier and a lot more special.
Assessing and Adjusting Flame Height
Keep an eye on that flame! If it’s looking more like a bonfire than a gentle flicker, it’s time to intervene. A flame that’s too high can be a fire hazard and cause your candle to burn too quickly. On the flip side, a flame that’s too low may struggle to maintain itself and could extinguish prematurely, leaving you with a wax pool that’s uneven.
So, what’s the fix? Simple: trim the wick. If the flame is too high, let the candle cool, then trim the wick down to 1/8 inch. If the flame is too low, make sure there’s no excess wax drowning the wick. You can carefully pour out a bit of the melted wax or soak it up with a paper towel. A little TLC can make all the difference in how your candle burns.
Preventing and Addressing Common Issues
Wooden wick candles have their quirks, but with a bit of know-how, you can keep them burning bright and even. Let’s tackle some common issues and turn you into a wooden wick whisperer.
Combating Tunneling: Balancing the Melt Pool
Tunneling can be a real downer. It’s when the wax burns down the middle, leaving a ring of hard wax around the edges. Not only does it look odd, but it also wastes wax and reduces your candle’s burn time. The trick to beating tunneling is patience. Always allow your candle to burn long enough for the entire surface to melt during the first burn and subsequent burns.
If you do end up with tunneling, don’t worry, you can fix it. One method is to gently warm the hard wax with a hairdryer, encouraging it to melt and join the party. Another option is to carefully remove some of the excess wax around the edge, giving your wick more room to breathe.
Fixing a Weak or Unstable Flame
A weak flame can be a sign that your wick needs a trim or there’s too much wax crowding it. Keep your wick trimmed, and ensure there’s enough air flow around the flame. Sometimes, a gentle breeze can help a weak flame find its strength, but be careful not to create a draft that could blow it out or cause it to burn unevenly.
If the flame is still struggling, check for drafts or move your candle to a different spot. A stable environment is key for a stable flame. And remember, never leave a weak flame unattended—it might need a bit of encouragement (or a trim) to get back to its full, glowing potential.
Wood Wick Resuscitation: When Your Candle Won’t Light
It’s a bummer when your wooden wick won’t light, but don’t throw in the towel just yet. First, check if the wick is too short. If it is, carefully remove some of the surrounding wax to expose more of the wick. If the wick is long enough but still stubborn, make sure it’s not coated in old, hard wax. A clean wick is a happy wick.
If all else fails, Brogsdale Candles has your back with their guarantee: if the wooden wick won’t light and stay lit, they’ll refund your money. It’s a win-win situation—you either get a beautifully burning candle or your money back to try again.
Advanced Wooden Wick Candle Techniques
Ready to take your wooden wick candle game to the next level? Here are some advanced techniques to ensure your candles burn brighter, longer, and safer.
First up, let’s talk about the environment. Keep your candles away from drafts, fans, or air conditioning units. These can disrupt the flame, causing it to flicker wildly or even extinguish. A stable, draft-free environment will help your candle burn more evenly.
Next, consider the temperature of the room. Extreme cold can make the wax hard and difficult to melt, while extreme heat can cause the wax to become too soft, affecting the burn quality. Aim for a happy medium—a comfortable room temperature is ideal for a perfect burn.
Lastly, don’t forget about humidity. Too much moisture in the air can affect the way your candle burns. If you live in a particularly humid area, consider using a dehumidifier to help maintain the optimal burning conditions for your wooden wick candle.
With these tips and tricks, your wooden wick candles will not only enhance your home decor but also provide a serene and inviting atmosphere. Remember, a little extra care goes a long way in ensuring the longevity and beauty of your candles. Happy burning!
Effects of Ambient Conditions on Candle Burning
Believe it or not, the room you’re in can play a big role in how your candle burns. Drafts, temperature swings, and humidity can all be party poopers for your candle’s performance. Keep your candles in a room where the air is calm, the temperature is steady, and the humidity is just right. This balance helps your candle burn evenly and last longer, ensuring that every flicker and sniff is as good as it should be.
Avoid placing your candle near windows or doors where drafts can cause the flame to dance more than it should. And remember, a hot room can cause the wax to melt too quickly, while a cold one can prevent the wax from melting properly. Aim for that sweet spot in the middle for the perfect burn.
Longevity Hacks for Your Wood Wick Candle
Want to make your wood wick candle last longer? Here are some hacks to stretch out those cozy nights:
- Keep the wick trimmed to 1/8 inch. It’s not just for show; it helps your candle burn more efficiently.
- Let the wax pool reach the edges every time you burn. This prevents tunneling and makes sure you use all the wax.
- Avoid burning for more than four hours at a time. It’s like a marathon for your candle, and it needs a break to cool down and reset.
- Store your candles in a cool, dark place when not in use. Light and heat can degrade the fragrance oils and wax over time.
- Use a candle snuffer to extinguish the flame. Blowing out your candle can cause wax to splatter and the wick to shift, leading to an uneven burn.
These hacks aren’t just good practice; they’re the secret to a candle that lasts and keeps its scent strong from the first light to the last.
When to Replace Your Wood Wick Candle
It’s hard to say goodbye, but there comes a time when your candle has given all it can. When there’s about 1/2 inch of wax left at the bottom, it’s time to let go. Burning past this point can be a safety hazard, as the container can get too hot. Plus, it’s a chance to try out a new scent or revisit an old favorite. So, when your candle’s time has come, thank it for the good times and move on to the next one.
Splendid Finale: Ensuring Lasting Glow and Fragrance
As your candle reaches the end of its journey, there are still ways to ensure it goes out with a bang. Keep up with the wick trimming and wax pool maintenance to get every last bit of fragrance and light. And even in these final hours, make sure to burn it on a heat-resistant surface to keep things safe.
Those last few burns are precious, and if you’ve taken care of your candle, it will take care of you, providing that warm glow and delightful scent until the very end.
Final Burn Tips and When to Say Goodbye to Your Candle
When you’re down to the last inch of wax, it’s time to start thinking about the end. But don’t be sad—those final burns can be some of the best. Keep an eye on the flame and make sure it doesn’t get too close to the container, which can become fragile towards the end. And when you’ve reached that 1/2 inch mark, extinguish the flame for the last time. It’s been a good run, but safety comes first.
Remember, a well-loved candle is one that’s burned safely and enjoyed fully. So, when it’s time to say goodbye, do it with a smile, knowing you’ve gotten the most out of your candle experience.
Decoding the Candle’s End Life Signals
Just like a great story, your candle will tell you when it’s coming to an end. Look for signs like a weak flame, little to no fragrance, or difficulty lighting the wick. These are your candle’s way of whispering, “I’m almost done.” And that’s okay. It means you’ve enjoyed every possible moment, and now it’s time for a new beginning.
So, when you see these signs, prepare to bid farewell. But don’t worry, there’s a whole world of scents and crackles waiting to be discovered with your next wooden wick candle.
And always remember, with Brogsdale Candles, you’re promised a wooden wick that lights up every time, or you get your money back. So even at the end, you can light up a new beginning with confidence. Find your next favorite candle at http://brogsdalecandles.com/.
Frequently Asked Questions
How do I properly extinguish a wooden wick candle?
Extinguishing a wooden wick candle is just as important as lighting it. To do it right, use a candle snuffer or gently dip the wick into the melted wax with a wick dipper and then straighten it back up. This method not only puts out the flame without any smoke but also primes the wick for the next burn. Avoid blowing out the candle, as it can cause hot wax to splatter and the wick to move, which might lead to an uneven burn next time.
What if my wooden wick candle is smoking?
If your wooden wick candle starts to smoke, it’s usually a sign that the wick is too long. The first step is to extinguish the flame and let the candle cool. Then, trim the wick down to about 1/8 inch, ensuring it’s free of any charred wood. Relight your candle and enjoy the smoke-free ambiance. If it continues to smoke, check for drafts or move the candle to a less breezy location.